This tutorial will teach you how to open a pull request using Intellij IDE.
Prerequisites:
1. Clone the GitHub Project
Use the command below to download the project on your local machine.
git clone git@github.com:MaddyGre/your-first-pr.git
Then, import the project on IntelliJ.
2. Create a New Branch
Let's create a new branch. To do this: use the following command.
git checkout -b First_Branch
You can do this via the IntelliJ terminal.
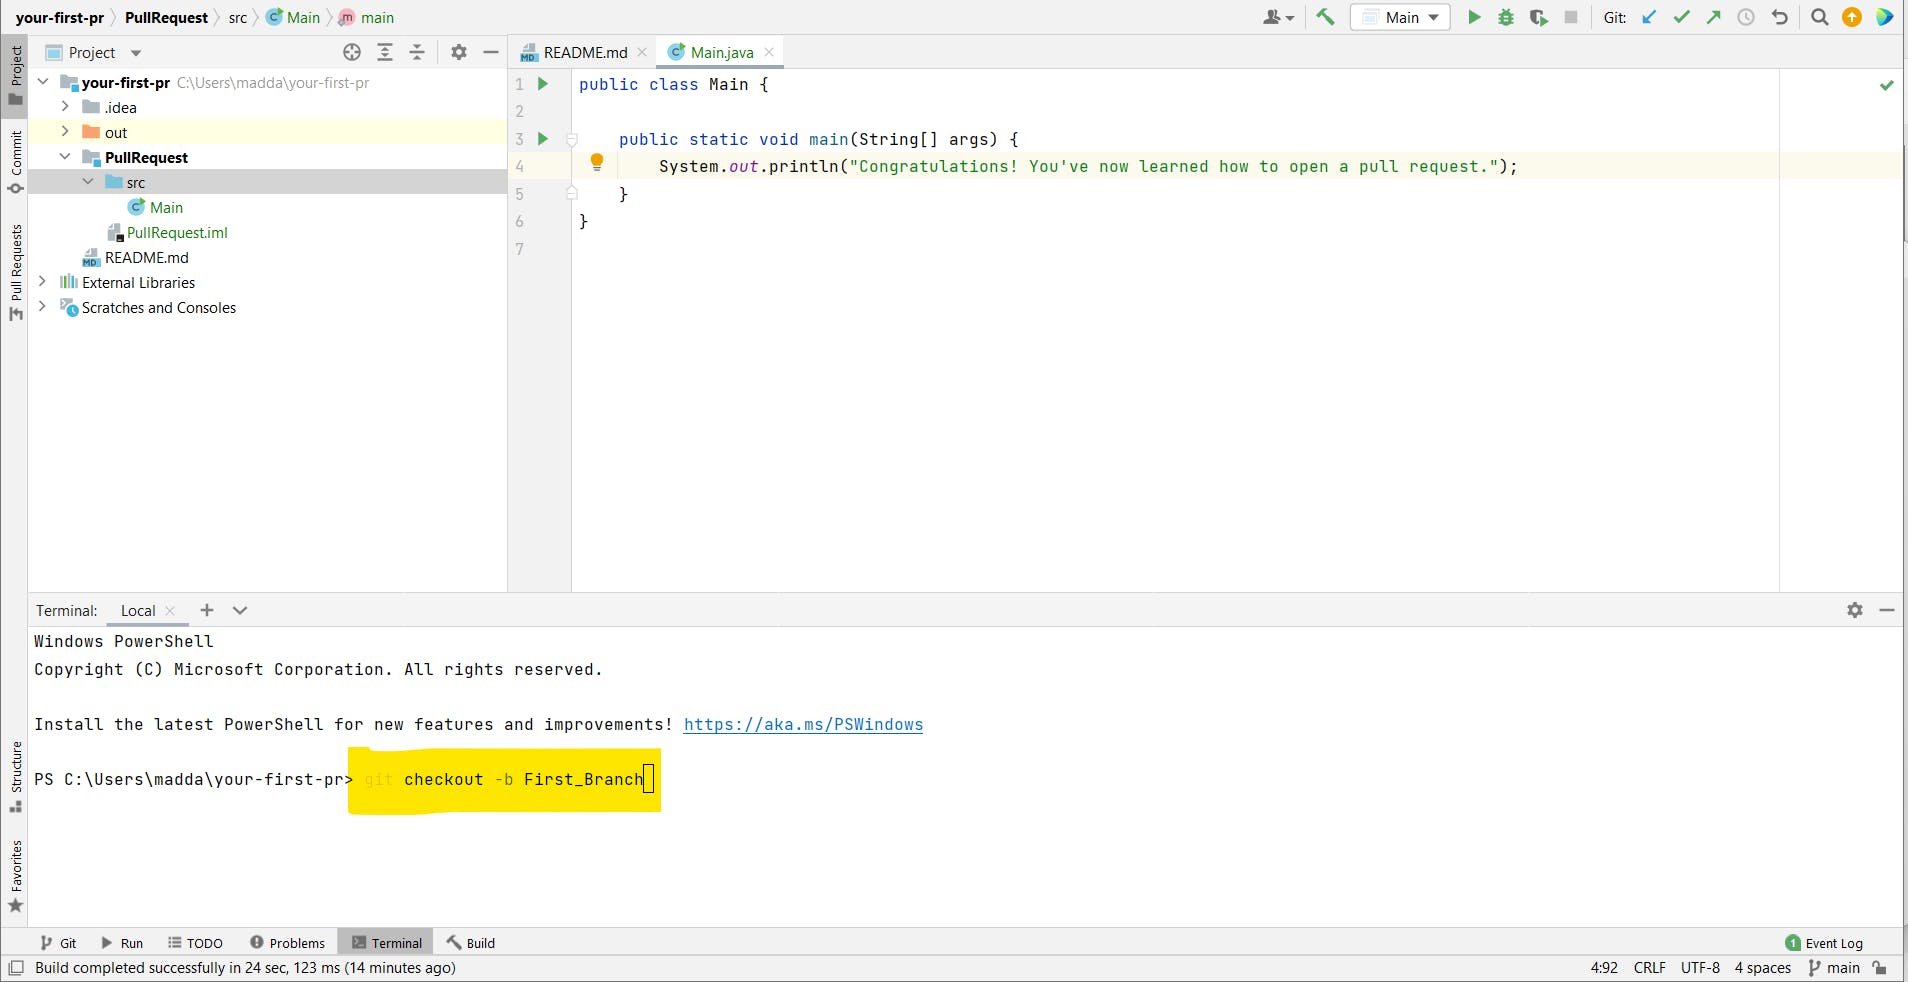
The -b allows you to:
Create a new branch (whose name is First_Branch).
Move from the main branch (the default branch) to the newly created branch.
You can see in which branch you're currently at the bottom of IntelliJ.
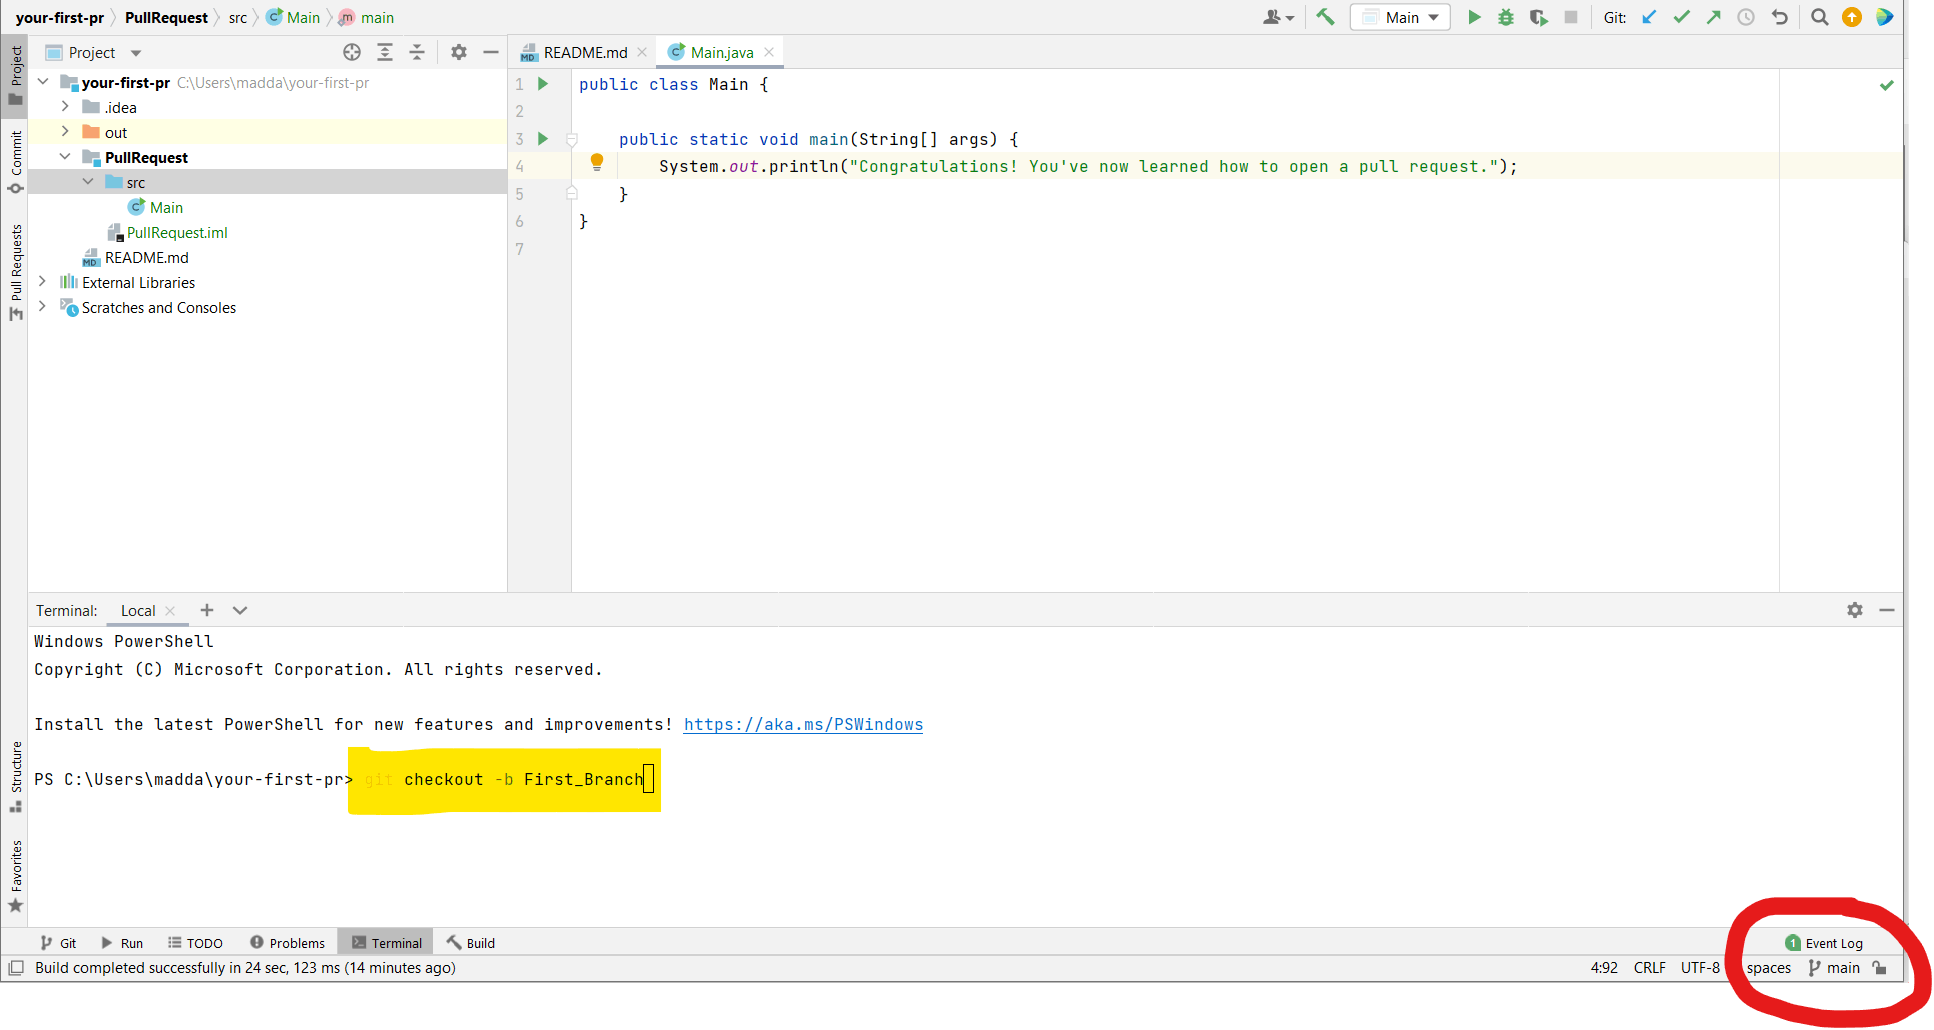
Once you select enter, the branch name will change.
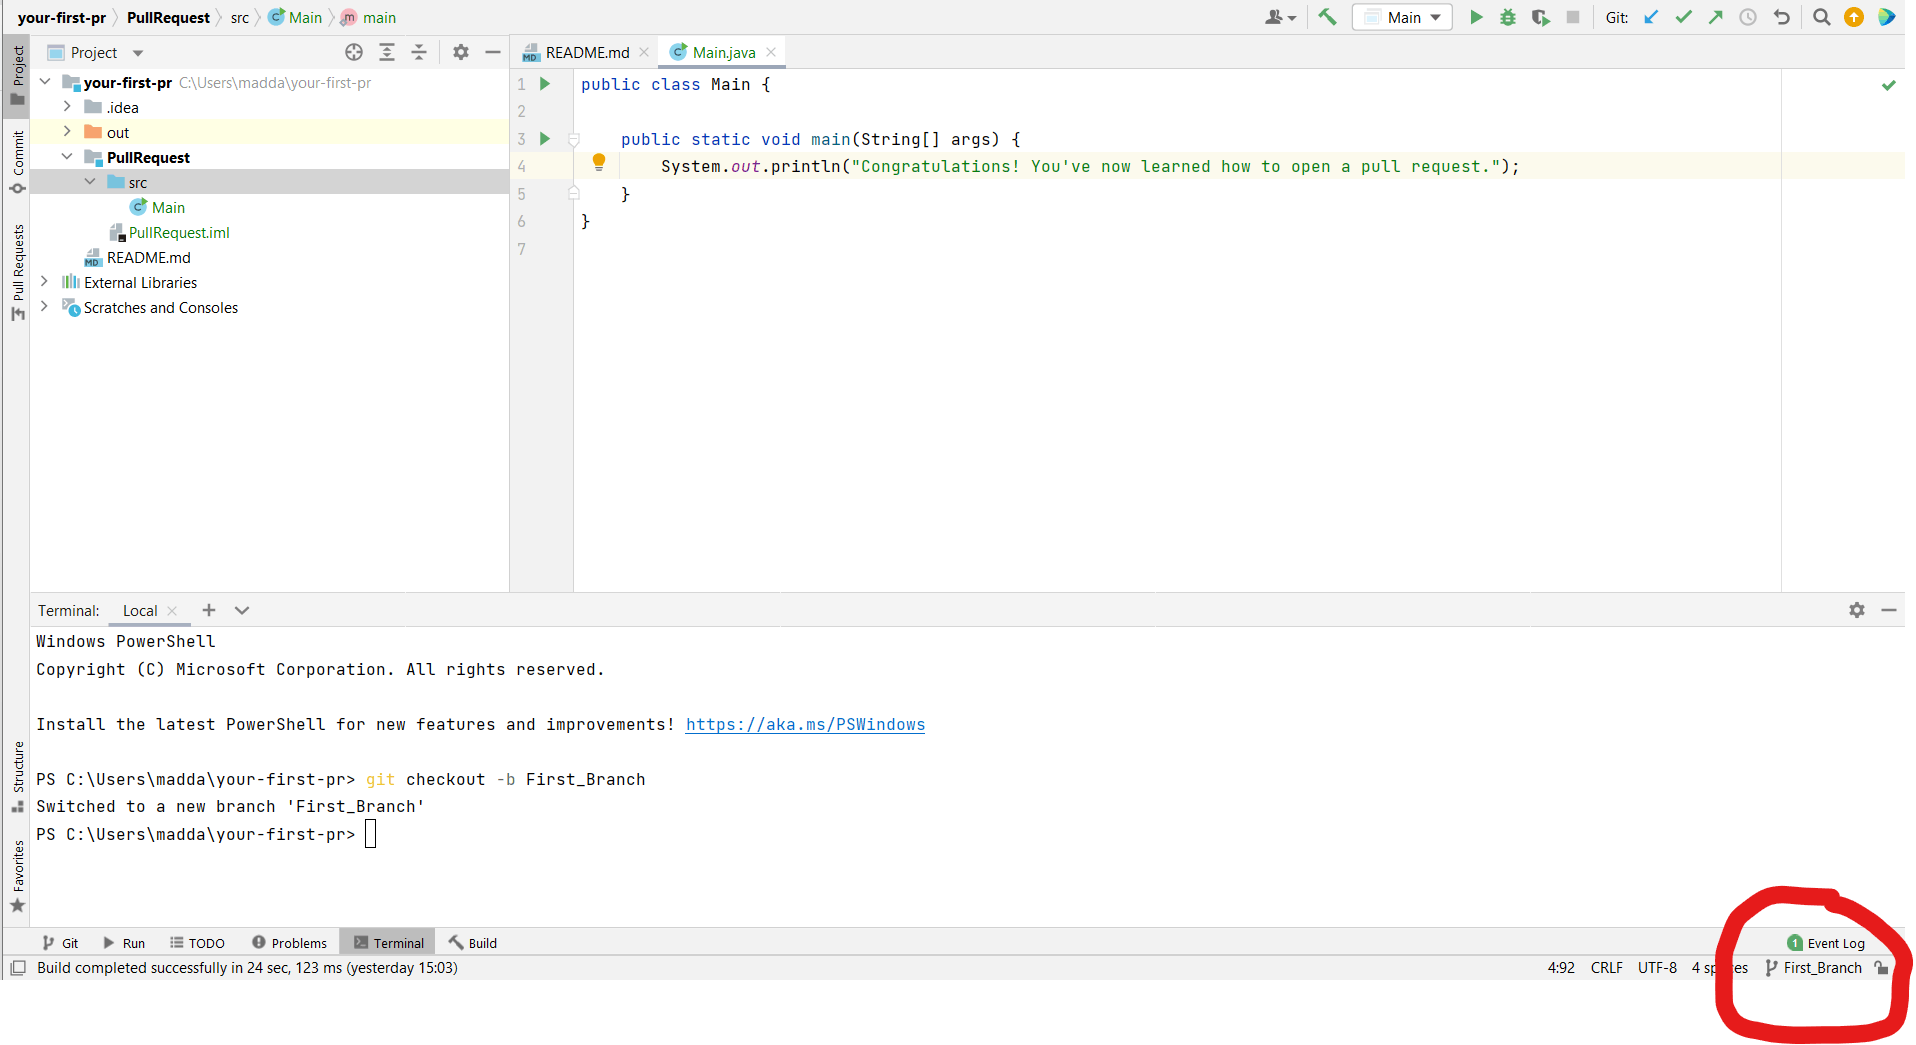
3. Create a New Folder
Once you import the project, create a folder called "PullRequest".
Inside this folder, create a class called Main.
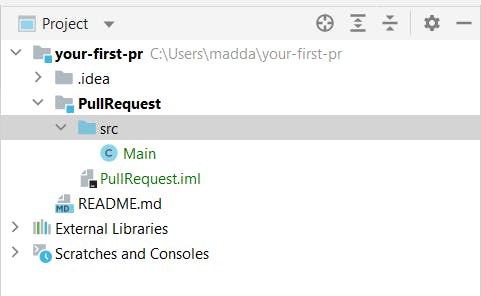
In this class, create a main method where you're going to print out the following message:
Congratulations! You've now learned how to open a pull request.
You have successfully created a new branch and are ready to open a pull request.
4. Create a Commit and Push
You should see a tab called "Commit" at the top left. This tab shows all your changes.
Select the files you want to move to the remote repository (in my case, I chose to push all of them).
Then, add a commit message in the text box.
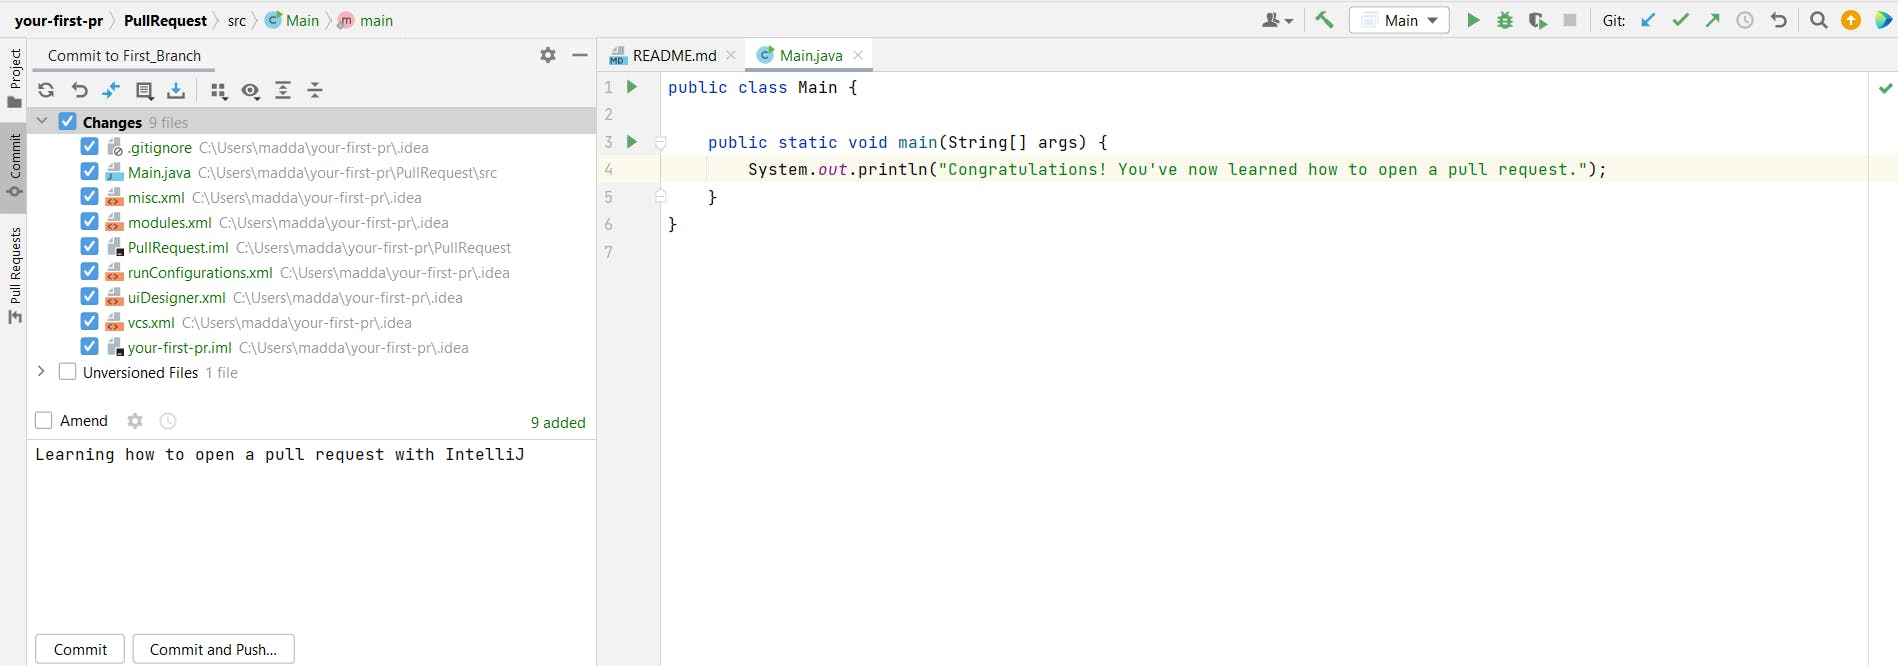
There are two ways to push the changes remotely:
By selecting the
Commit and Pushbutton.Entering
Commitand laterPushmoving your changes remotely.
You can decide to do it either way.
I use the Commit and Push button most of the time as it's quicker.
5. Create a Pull Request
Now, let's go back to GitHub.
You should see a message like this:

Select the Compare & pull request button.
You should see a panel like this:
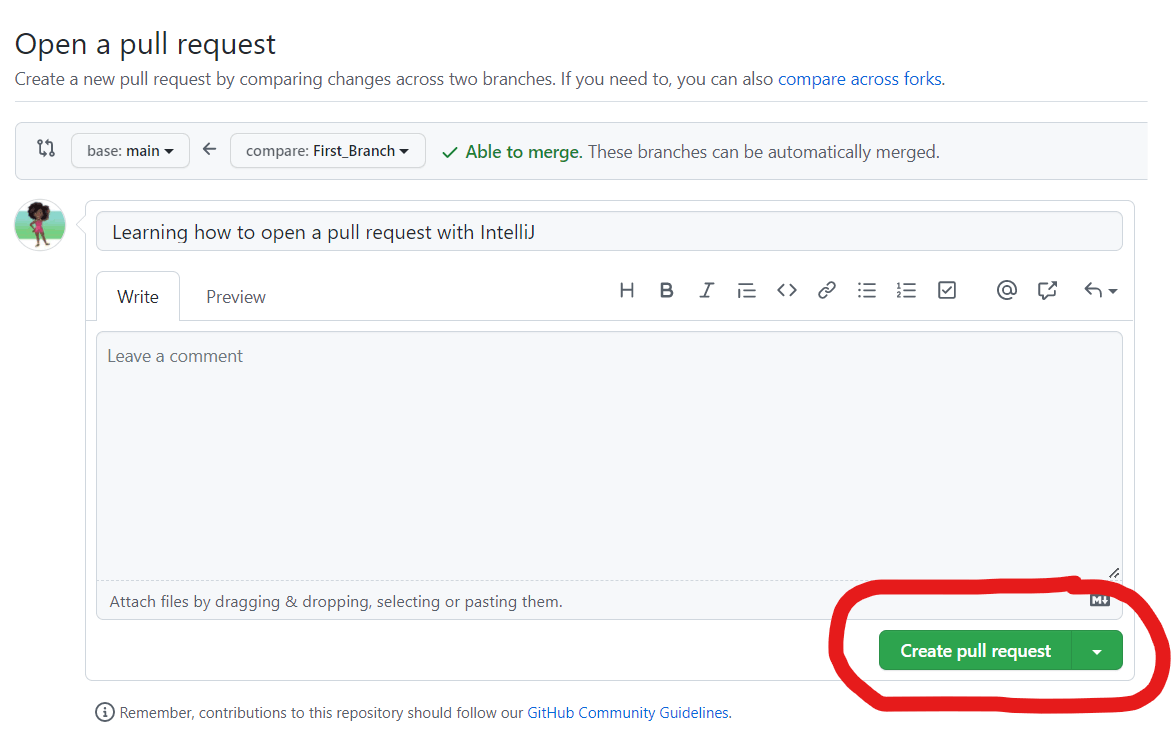
The branch First_Branch will be merged to the main branch.
If you've noticed, the "Create pull request" button has an arrow that will present you with the option of creating a draft pull request.
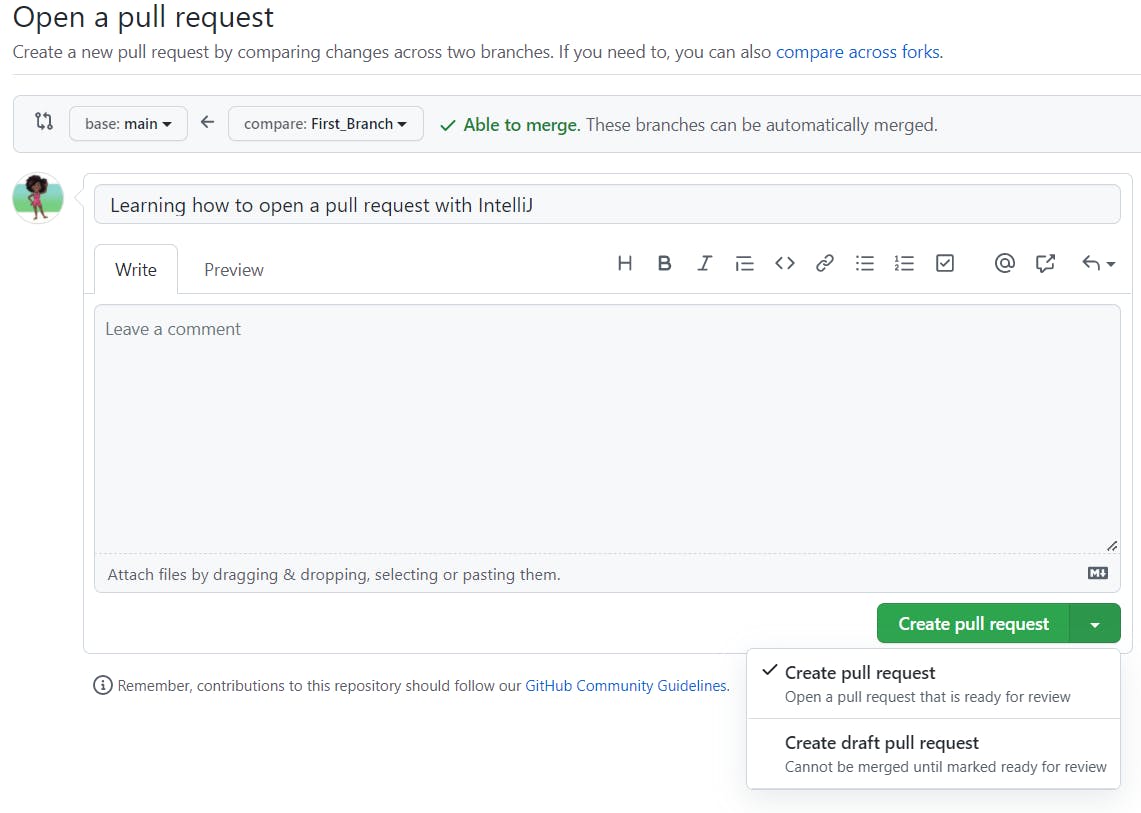
It's ideal to open a draft pull request when your pull request is not ready for review yet.
For now, let's stick with a fully finished pull request.
Go ahead and select the Create pull request button.
6. Merge a Pull Request
After you select the button, you should see this on GitHub:
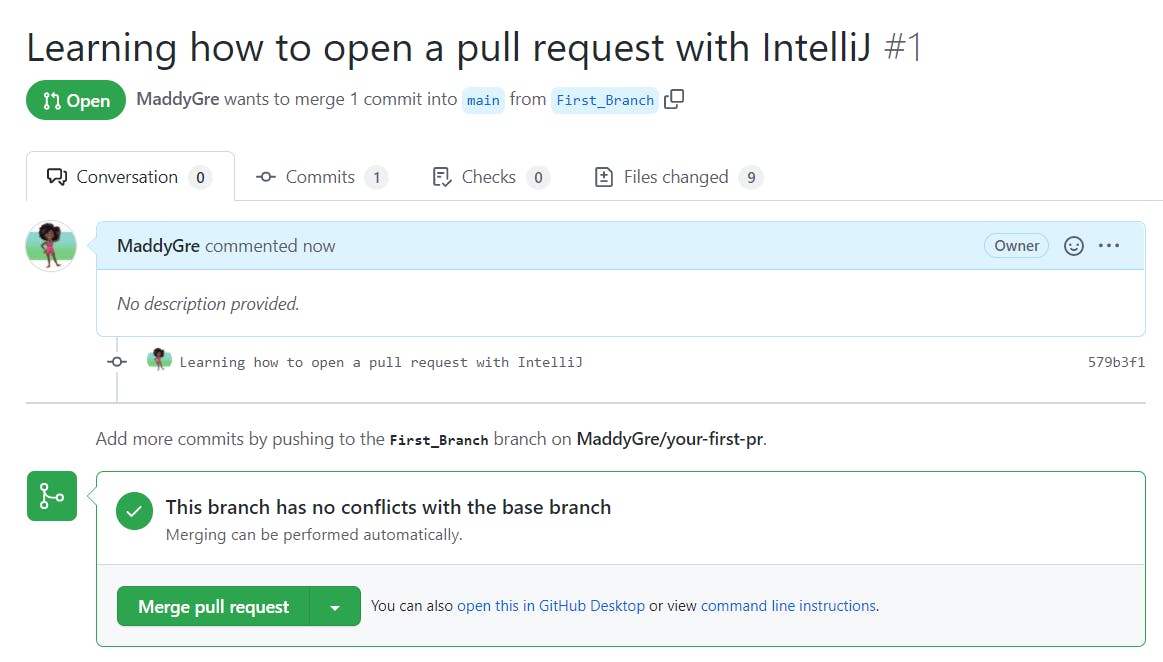
In the real world, your pull request will undergo a code review by 1/2 colleagues before you can select the merge button.
In addition, your pull request will go through some checks (for example, code smells, code analysis, etc.) before the "Merge pull request" appears.
Since this is a simple tutorial, you can merge the pull request.
This is what you should see once you merge the pull request.
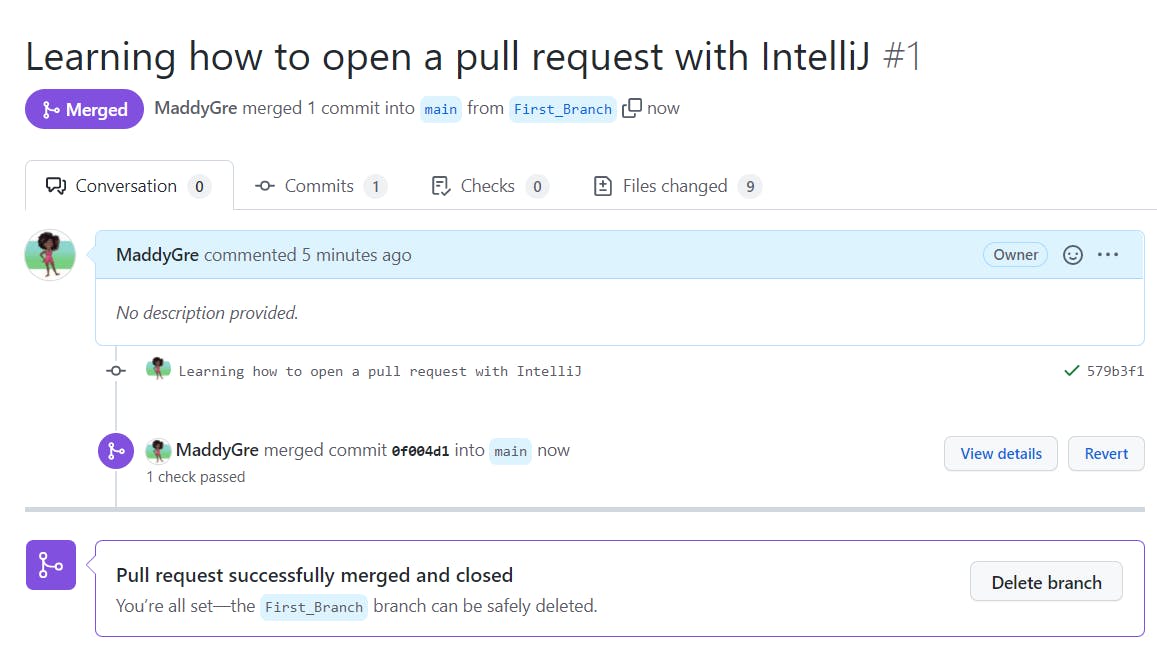
Once you merge a pull request, you cannot go back and change it.
You might be wondering:
What if I have to make some further changes?
You go back to step 1.
Why is it important to know what a pull request is?
A pull request is how you communicate to your teammates that you have changed the codebase and you want those changes to be merged.
As a software engineer, you will open pull requests almost weekly.
I hope you've found this article helpful.
Please let me know your problems while opening a pull request.
Until next time! 🙋🏾♀️
ADDITIONAL RESOURCES

